Crispy Korean Honey Fried Chicken

The Crispy, Sticky, Sweet Secret: Korean Honey Fried Chicken Made Better with Mānuka Honey
There’s something about Korean fried chicken that just hits differently. It’s ultra-crispy, fiery, sweet, and unapologetically bold—every bite is a full-on flavor experience. And while the restaurant scene is brimming with amazing KFC spots (yes, we mean Korean Fried Chicken, not the fast-food chain), there’s still nothing quite like making your own version at home—especially when you give it your own twist.
Recently, we swapped out the typical sugar or corn syrup in my gochujang-based glaze for something a little more special: Steens Raw Mānuka Honey. And we’re not being dramatic when we say it completely changed the game.
A Love Letter to Korean Fried Chicken
If you’re already a Korean fried chicken fan, you know the essentials—thin, shatteringly crispy crust, often double-fried for that extra crunch, tossed in a sticky glaze that balances sweet, spicy, and umami-rich flavors. It’s indulgent, satisfying, and often eaten with chilled pickled radish or a cold beer.
Growing up, we didn’t have Korean Fried Chicken at the dinner table, but we have now had the privilege of discovering it in all its glory. Whether it’s from a beloved Koreatown joint or a low-key delivery spot, Korean fried chicken became one of those dishes we look forward to after a long week or order to celebrate something small and good.
But we’re also very conscious about what goes into the food we eat. So when we started experimenting with making our own version at home, we wanted to bring in ingredients that not only delivered on flavor—but that felt a bit better for us, too. Enter: Steens Raw Mānuka Honey.
Why Manuka Honey is best
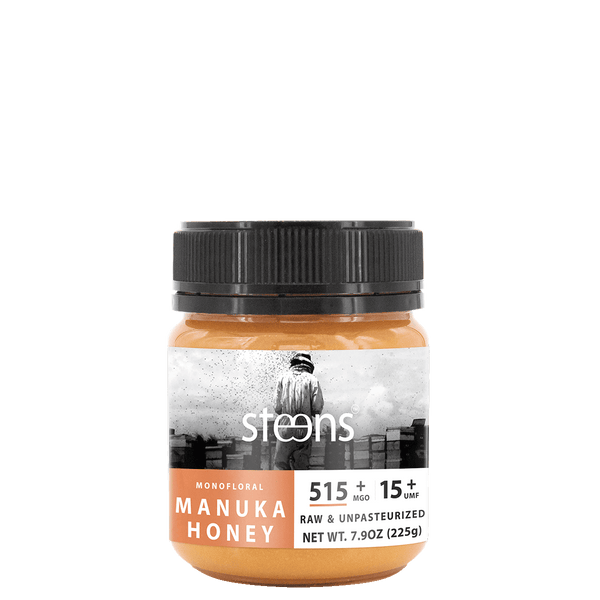
Let’s start with the basics. Steens Mānuka Honey is raw, unpasteurised, and packed with naturally occurring nutrients like bee bread and bio-available pollen. Bee Pollen is known to be incredibly rich in antioxidants, minerals, and enzymes. You can taste the difference, too. It’s thicker, richer, and more complex than the average honey you find at the supermarket.
But it’s the flavor that really got us thinking about how it could level up a Korean glaze. Mānuka honey has this earthy depth that complements the fermented heat of gochujang and the saltiness of soy sauce in a way that sugar just can’t. It brings a mellow sweetness, rounded out with its slightly herbal edge, that doesn’t overpower the spice but enhances it.
It also caramelizes beautifully. In the pan, it melts into a glossy, sticky coating that clings to the crispy chicken skin in all the right ways.
A Little Bit of Balance
Let’s be honest: Korean fried chicken is never going to be a “light” meal. It’s fried. It’s sauced. It’s indulgent. But using Steens Mānuka Honey gives you peace of mind that, even in moments of indulgence, I’m still choosing an ingredient that supports my body.
Mānuka honey is known for its antibacterial and anti-inflammatory properties. It’s also packed with polyphenols and flavonoids, which is perfect if you are focusing on supporting your immune system naturally. It feels good to know that our glaze isn’t just a sugar bomb—it’s adding more than just sweetness.
As people who juggle long days, too much screen time, and trying to squeeze in some form of wellness every day (movement, breathwork, decent hydration), small swaps like this feel like wins. And when they taste better? Even better.
That First Bite
When we first made the dish with Steens honey, we didn’t expect the difference to be so obvious. But as we bit into that first piece—still hot, sauce dripping, crisp giving way to tender meat—we were genuinely surprised.
The glaze had this luxurious texture. The flavor lingered longer. The heat from the gochujang and chili flakes hit first, followed by that deep, floral sweetness that rounded everything out. There was a savory depth from the soy and garlic, but the honey brought balance, tying it all together without overwhelming anything.
Paired with some crisp cabbage slaw and quick-pickled cucumbers, it felt elevated but still comfort food at its core.
Cooking as a Creative Ritual
Making Korean honey fried chicken isn’t a quick meal—it’s a process. But we’ve come to love that about it. It’s the kind of dish that invites you to slow down, focus, and get your hands a little messy. We think of cooking not just as fuel, but as a creative ritual. It’s a space where we can play, tweak, and infuse a little more intention into what we eat.
Using ingredients like Steens Mānuka Honey has made that even more meaningful. It’s ethically sourced, minimally processed, and made with care. And that matters to us, especially when we’re building a pantry that reflects our values as much as our tastebuds
Where to Find It
Get your Steens from Erewhon, where you can stock up on a few jars at a time. It’s a bit of a splurge, but one that feels entirely worth it—especially because a little goes a long way. Whether stirring it into tea, drizzling it on yogurt, or whisking it into spicy sauces like this, it’s one of those staples that earns its place on the shelf.
Final Thoughts
Korean honey fried chicken is the kind of dish that doesn’t need reinventing—but when you find an ingredient that truly elevates it, you pay attention. Steens Raw Mānuka Honey brings something unexpected to the table: complexity, balance, and a sense of nourishment, even in the most indulgent meal of the week.
And that’s kind of the sweet spot, isn’t it? Flavor that thrills, ingredients that matter, and food that brings joy without compromise.
If you haven’t tried swapping sugar for Mānuka honey in your sauces, this might be your sign. Trust us, your next batch of Korean fried chicken will thank you.

Ingredients
- 4 boneless, skinless chicken breasts
- 1 cup all-purpose flour
- 2 large eggs, beaten
- 2 cups crushed cornflakes cereal
- 1 teaspoon garlic powder
- 1 teaspoon paprika
- 1/2 teaspoon salt
- 1/4 teaspoon ground black pepper
- Cooking spray or vegetable oil (for greasing)
For the Hot Honey Glaze:
- 1/4 cup honey
- 2 tablespoons hot sauce (adjust to taste)
- 1 tablespoon melted butter
- 1 teaspoon apple cider vinegar
Method

Step 1: Preheat Your Oven
Preheat your oven to 375°F (190°C). A moderate temperature ensures the chicken cooks evenly and the coating becomes beautifully golden and crispy.
Line a baking sheet with foil or parchment paper for easy cleanup, then place a wire rack on top. Grease the rack lightly with cooking spray or a thin layer of oil. Using a rack allows the hot air to circulate around the chicken, creating an even crunch without flipping halfway through.

Step 2: Prepare the Breading Station
Set up your breading station with three shallow dishes:
- In the first dish, add the flour.
- In the second dish, beat the eggs until smooth.
- In the third dish, combine crushed cornflakes with garlic powder, paprika, salt, and black pepper.
The crushed cornflakes are the star of this breading—delivering a satisfying crunch that rivals deep-fried chicken. Make sure the cornflakes are crushed finely enough to adhere well but still have a little texture.

Step 3: Coat the Chicken
Start by patting each chicken breast dry with paper towels. Removing excess moisture ensures the breading adheres evenly and stays crisp.
- First, coat the chicken in the flour, shaking off any excess. The flour provides a dry base that helps the egg and cornflake mixture stick.
- Next, dip the chicken into the beaten eggs, making sure it’s fully coated. Let any excess drip off before moving to the next step.
- Finally, press the chicken into the seasoned cornflake mixture. Use your hands to press the crumbs firmly onto each piece, ensuring an even layer.

Step 4: Bake the Chicken
Place the coated chicken breasts on the prepared wire rack. This setup ensures the hot air circulates around the chicken, creating an even, crispy crust.
Lightly spray the tops of the chicken with cooking spray or brush them with a small amount of oil. This helps the coating turn golden and crunchy as it bakes.
Bake the chicken for 25-30 minutes, or until the internal temperature reaches 165°F (74°C) when checked with a meat thermometer.

Step 5: Make the Hot Honey Glaze
While the chicken bakes, prepare the glaze. In a small saucepan over low heat, combine the honey, hot sauce, melted butter, and apple cider vinegar. Stir until smooth and well blended.
Taste the glaze and adjust the heat level by adding more hot sauce if desired. If you prefer a thicker glaze, simmer it for an extra minute or two until it slightly reduces.


Step 6: Glaze and Serve
Once the chicken is done baking, remove it from the oven and let it rest for 2-3 minutes. This allows the juices to redistribute and keeps the chicken tender.
Either brush each piece generously with the hot honey glaze, drizzle it over the top or use as a dipping sauce. Serve immediately while the chicken is warm and the glaze is sticky and flavorful.